


3 DIY, nature-inspired Mother's Day gifts
/Mother’s Day is just around the corner!
To keep yourself from having to fight off everyone to get to the best cut flowers at the grocery store on that fateful Sunday morning, do a little planning ahead to make your own gift that is both sentimental and nature-friendly. This year, I’m working on three different gifts that anyone can make with the right supplies!
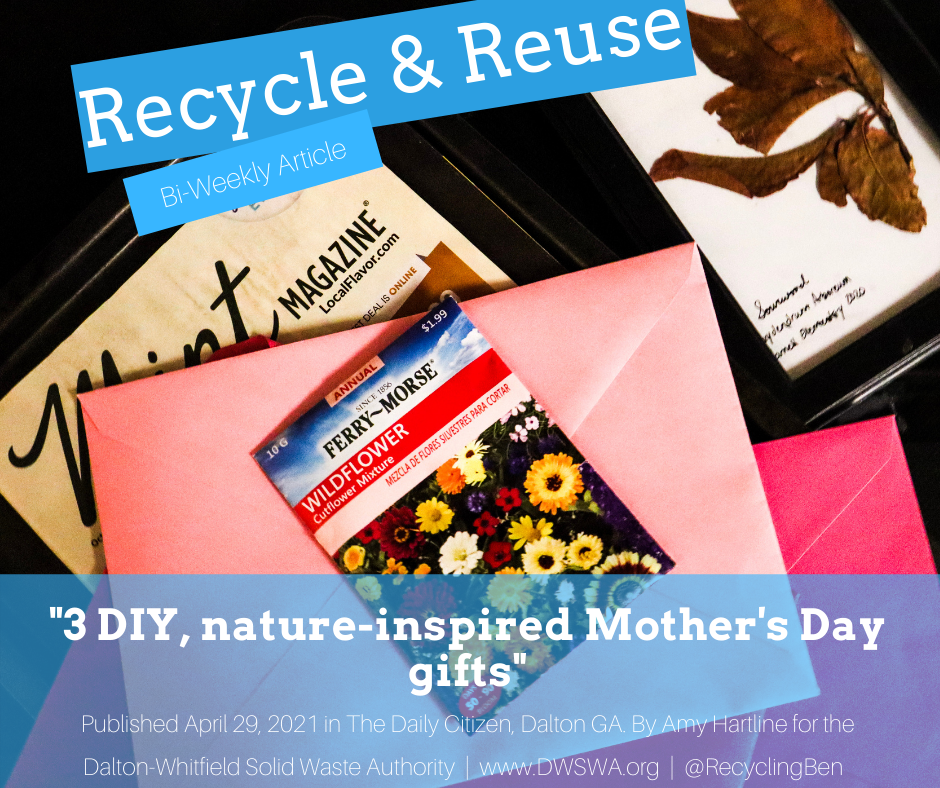
To add color to your seed paper card, you can use bright colored paper like these envelopes or add food coloring to your pulp.
Making seed paper cards is one of the best Mother’s Day card options because the process is just a little messy and fun and the card itself can grow into another gift. All you need is used paper such as printer paper or even this newspaper that is either run through a paper shredder, food processor or cut into small pieces, a large bowl of warm water, window screen material, wildflower seeds and a baking pan.
First, soak your paper pieces in the tub of water, mash them with your hands and let it soak for a few hours. I recommend about one and a half cups of paper for each card. After, you see the pulp turn the water slightly gray, arrange your pulp on the screen or netting material in the shape you would like. Press out as much water as you can and then flip the shape onto the baking pan to dry. While the shape is still wet place the seeds onto the side of the card facing up.
Wait 24 hours for the card to dry and then decorate and write on the other side however you like. Your mother can plant the paper by laying it on the surface of soil, sprinkling about one-quarter-inch thick layer of soil on top and then watering it regularly until the seeds start to sprout and grow roots.
For a botanical gift to go with the card, consider making a scarf stamped with flower prints or leaves from important places. First, gather your supplies:, a light-colored scarf, fabric paint, a sponge, scrap paper, a rolling pin or brayer and the large leaves or flowers from important places that you want imprinted.
The process is fairly simple. First, lay your fabric flat where you would like the print to be and then paint over one leaf at a time using your sponge. Lay your leaf paint side down on your fabric and cover it with your scrap piece of paper. Firmly and carefully roll over the paper and leaf onto the fabric and then peel your leaf off. Now you just repeat with each leaf and let it dry.
If you like the idea of using pressed leaves or flowers, but don’t want to mess with paint another simple gift is a small jewelry dish. To do this project you need air dry clay, parchment paper, a bowl, a butter knife, a rolling pin and your leaf.
Start by rolling out your clay flat to about a half to an inch thick on top of the parchment paper. Then cut out a circle using your knife. I recommend tracing a circular object you can place on top to make it easier. Then place your leaf with the veins down onto the dish and gently roll over the circle to make the imprint. The benefit of clay over paint is that if when you peel off your leaf you aren’t entirely happy, you can just roll up the clay and start over. Lift up your clay circle and place it into your bowl and let it dry for a few days. If you would like to add color to the dish, you can paint it whatever color you like using water colors and then spray a clear coat over the dish to preserve it.
This Mother’s Day plan just a little ahead and take inspiration from the outdoors to create a meaningful gift your mother can treasure past just one day of the year with these do-it-yourself options!
Amy Hartline is the recycling and education program coordinator for the Dalton-Whitfield Solid Waste Authority. Have a recycling question? Contact her at (706) 278-5001 or at ahartline@dwswa.org.